Getting Started
This guide walks you through setting up Customer Risk Scoring for the first time, from choosing your risk level scale to activating your first ruleset.
Step 1: Choose Your Risk Level Scale
Before creating any ruleset, your organization must choose how many risk levels to use: between 3 and 6.
This is a permanent, organization-wide setting. It cannot be changed after it is set and applies to all scoring configurations. Take the time to align this with your internal risk classification framework before proceeding.
Common choices:
- 3 levels — Low / Medium / High (straightforward, easy to operationalize)
- 4 levels — Low / Medium / High / Critical (adds a distinct category for the most severe cases)
- 5 levels — useful when you need finer granularity for periodic review cadences
Once set, go to Settings → Risk Scoring and configure the number of levels.
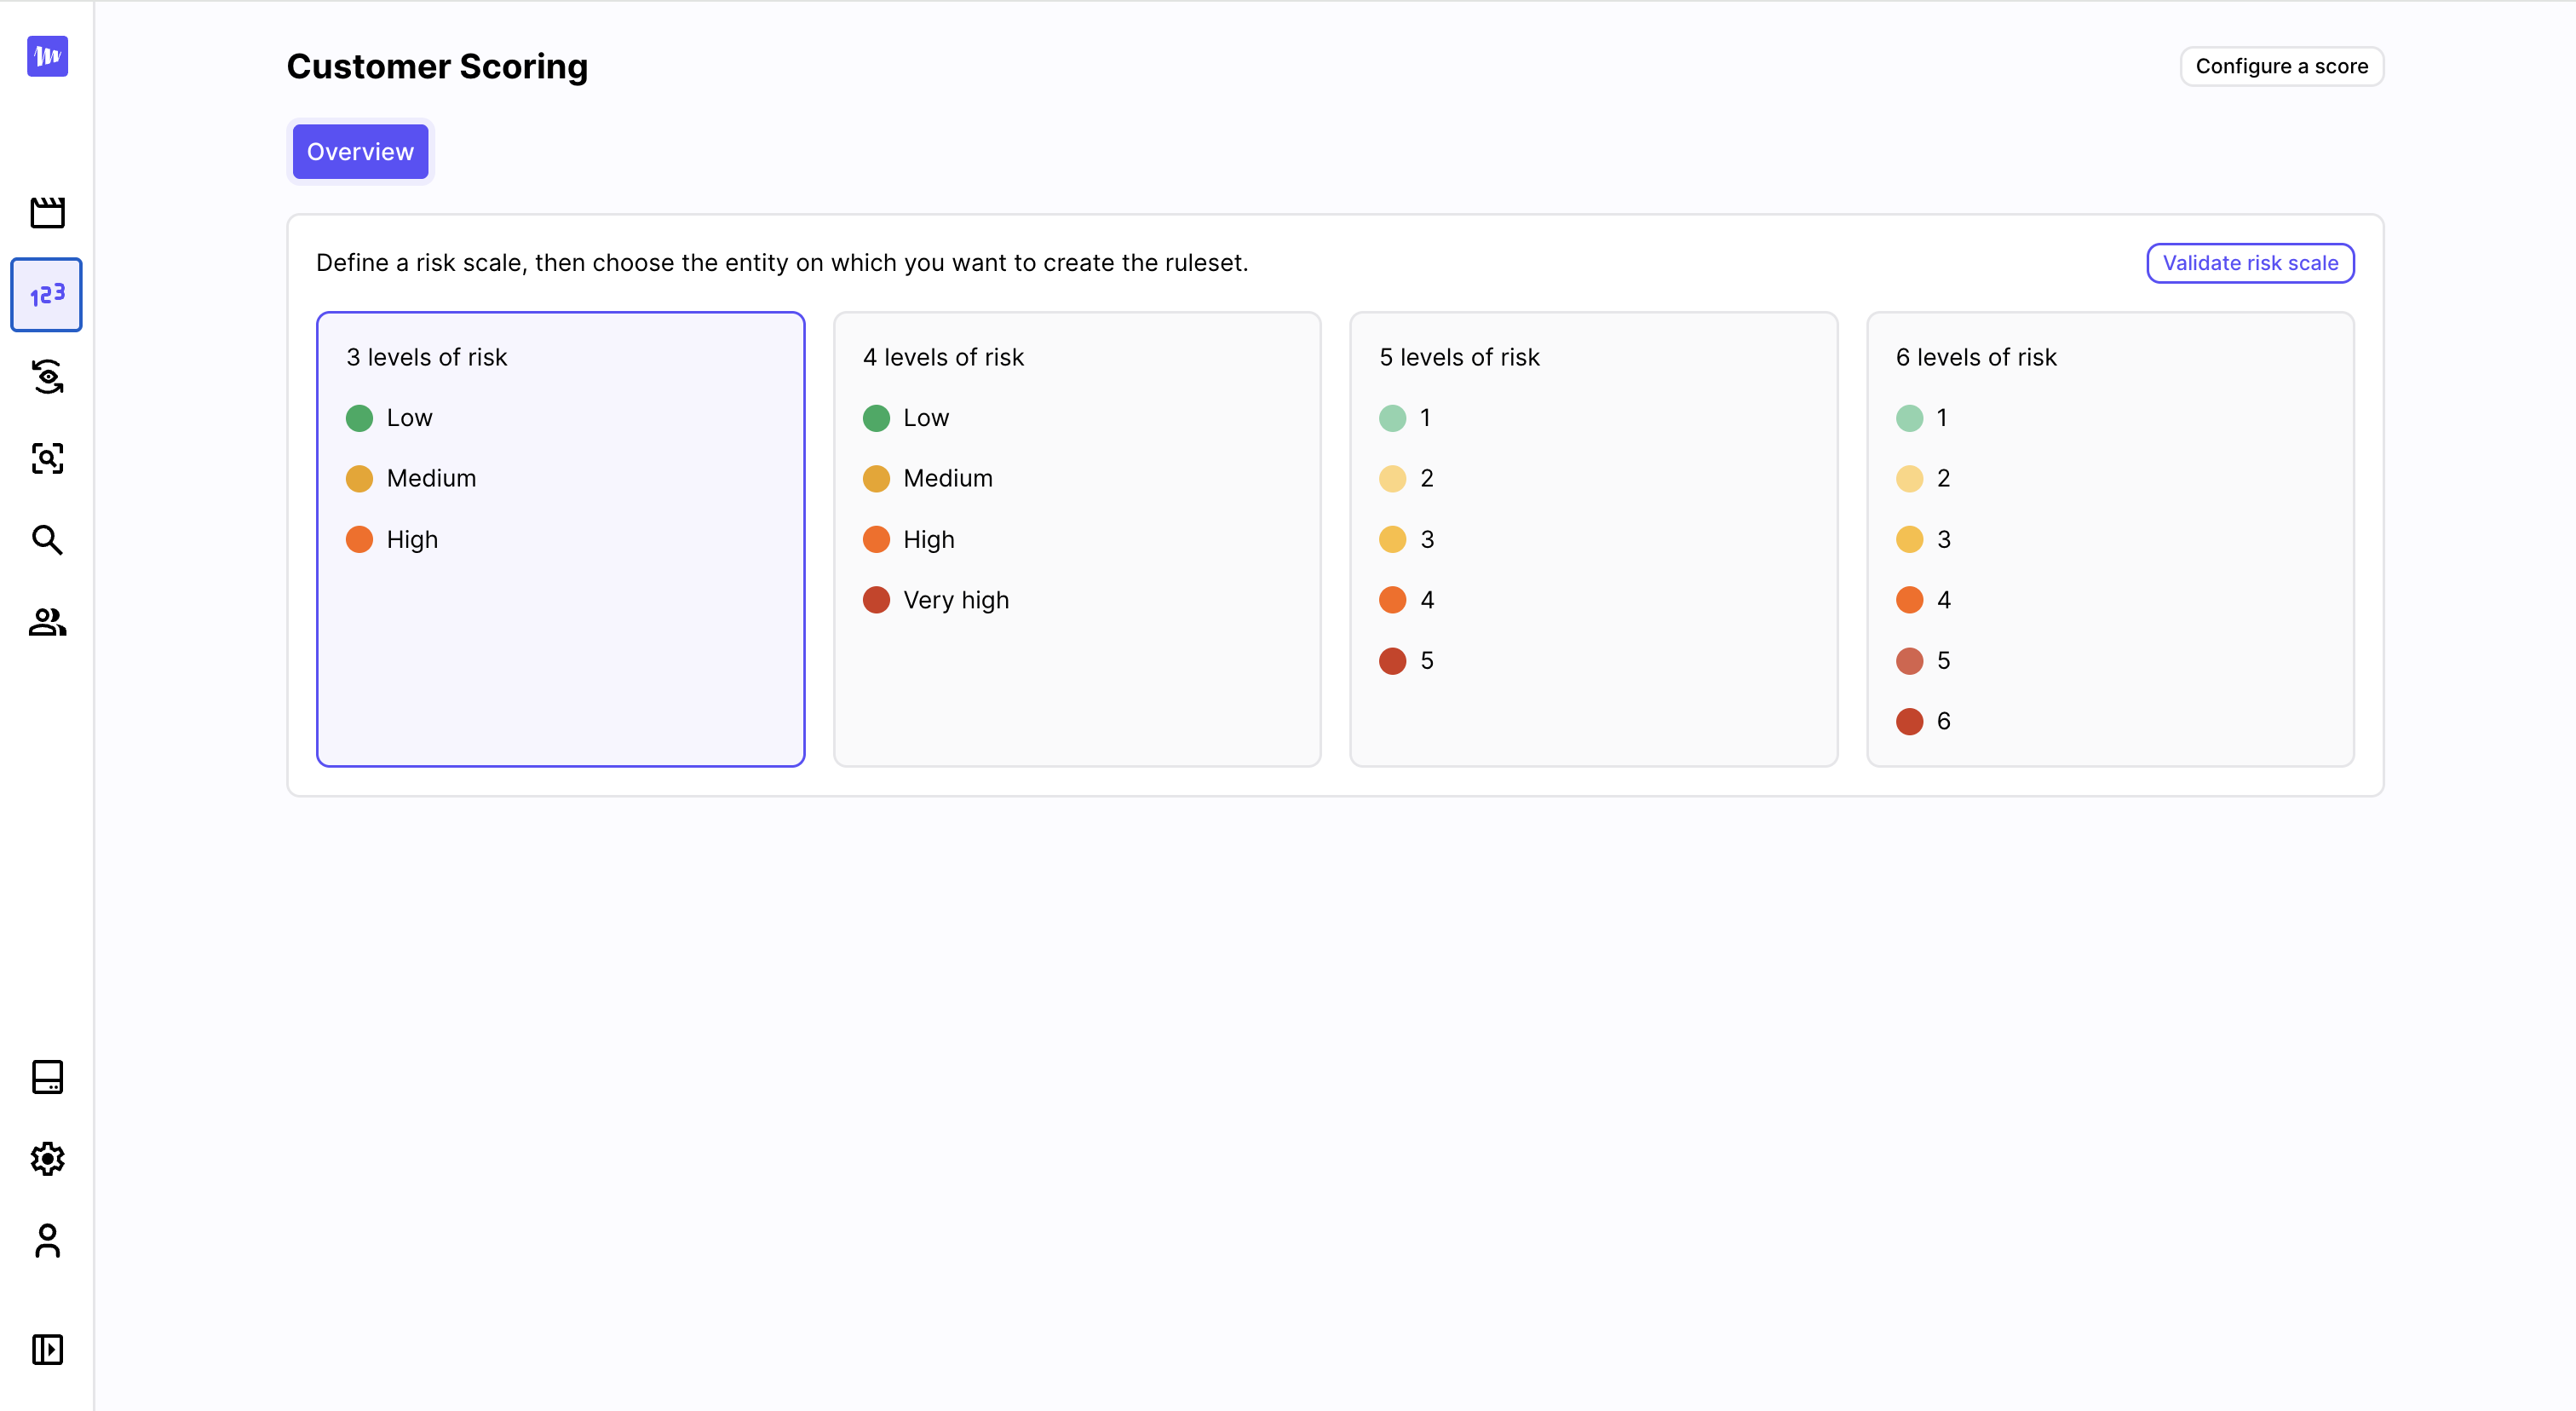
Choose between 4 risk scales
Step 2: Identify Which Entity Type to Score
Scoring rulesets are tied to a specific entity type in your data model. In practice, you will almost always want to score your end-customer or user table — the object that represents the individual or legal entity you have a relationship with.
Transaction tables, event tables, and similar objects are not appropriate scoring targets: they represent events, not customers, and their risk signals are better handled by transaction monitoring scenarios.
If your data model has multiple customer-type tables (e.g. individual customers and corporate customers), you can create a separate ruleset for each.
Step 3: Create Your First Ruleset
Go to Risk Scoring in the left navigation and select the entity type you want to score. Click New ruleset version.
Fill in the general parameters:
Name and description
Give the ruleset a clear name that reflects the entity type and the methodology version (e.g. "Individual customers — v1"). The description is a good place to note the regulatory framework or internal policy it implements.
Score thresholds
Define N−1 thresholds for N risk levels. These are numeric values that determine at what total score a customer moves from one level to the next.
Example for 3 levels:
- Level 1 (Low): total score < 30
- Level 2 (Medium): 30 ≤ total score < 70
- Level 3 (High): total score ≥ 70 → Thresholds:
[30, 70]
The scale of scores is entirely up to you — it depends on the modifiers you assign to your rules. Start simple: use a 0–100 scale and assign modifiers like 10, 20, 30 per rule, then adjust after backtesting.
Max recompute interval
How often should a customer's score be refreshed at minimum, even without any triggering event? A typical value is 30 to 90 days for a CDD use case. Set this according to your policy for periodic review frequency.
Cooldown period
How long must a customer remain at a given risk level before being allowed to move down? A value of 90 to 180 days is common. This prevents scores from oscillating and gives your team time to act on elevated risk levels.
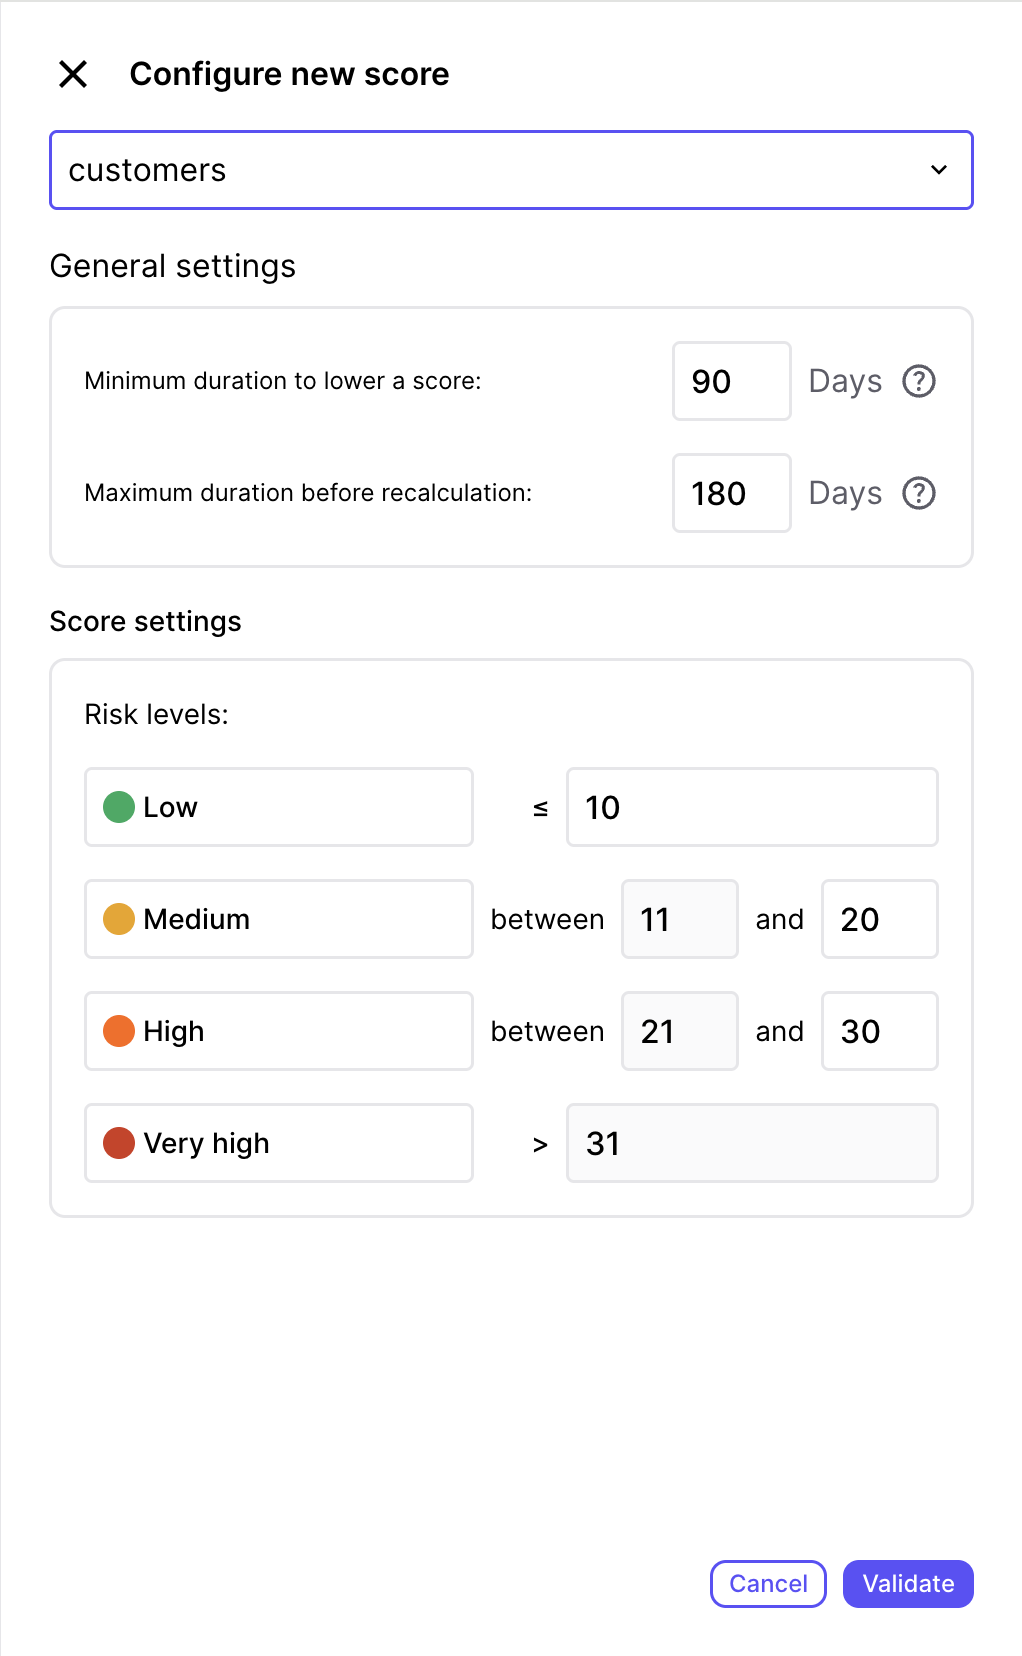
Set up the parameters of your risk score
Step 4: Add Rules
With the ruleset parameters set, add your scoring rules. Click Add rule and select a category and input type.
Start with your highest-signal factors
Don't try to model everything at once. Start with the 5–10 factors that most reliably distinguish high-risk from low-risk customers in your portfolio. Common starting points:
- Geo risks: country of residence, nationality, country of incorporation
- Customer features: legal form (individual vs. corporate), business activity type, PEP status
- Distribution channels: acquisition channel, onboarding method
- Aggregates: 12-month incoming transfer volume from high-risk countries, 6-month cash disbursement total
Configure conditions and score modifiers
Each rule contains one or more conditions. For each condition, you set:
- The trigger — what value or range causes this condition to apply
- The score modifier — how much to add (or subtract) from the total score
- Optionally, a minimum risk level — a floor that applies regardless of the total score
Example rule — "Country of residence":
| Condition | Score modifier | Min level |
|---|---|---|
| Country in [FATF high-risk list] | +40 | Level 3 |
| Country in [Internal watchlist] | +20 | — |
| Country in [EU/EEA] | 0 | — |
| Other | +10 | — |
Use minimum levels for non-negotiable factors
The minimum level floor is useful for mandatory escalations. For example: any customer with an active sanctions hit must be at least level 3 (High), regardless of their total score. Set this as a floor on your sanctions tag rule — it will hold even if the score total would otherwise put them at level 1.
Step 5: Backtest Before Activating
Once your rules are configured, run a backtest before activating the ruleset.
Go to the ruleset version and click Run backtest. Marble will evaluate the ruleset against a random sample of your existing customers and show you the projected distribution of risk levels.
Use the backtest to:
- Verify the distribution looks reasonable (e.g. not 95% of customers at the highest level)
- Identify rules that are unexpectedly triggering too broadly or too narrowly
- Compare the projected distribution to your current active version (if one exists)
Adjust your thresholds or score modifiers and re-run the backtest until the distribution reflects your risk appetite.
Step 6: Commit and Activate
When the ruleset is ready:
- Commit the ruleset version — this finalizes it and prevents further edits
- Set it as active — this makes it the live version used for all future score computations
Activating a new version does not immediately rescore all customers. Marble will gradually recompute scores as customers are encountered (profile views, scenario evaluations, ingestion events) and through the background recompute worker. The transition is progressive, not instantaneous.
Step 7: Monitor the Distribution
After activating, check the scoring overview page periodically to see how the risk level distribution evolves as the new version propagates across your customer base.
If you need to roll back, you can set any previous committed version as active at any time.
Next Steps
- Connect risk levels to transaction monitoring — edit your transaction monitoring scenarios to reference the customer risk level as a condition, enabling risk-differentiated alert thresholds
- Review the customer hub — verify that risk levels and history are displaying correctly on customer profiles
- Set up periodic review workflows — use risk levels to prioritize which customers your analysts review and when
- Iterate — as your portfolio evolves, create new ruleset versions, backtest, and activate without disrupting live operations
Updated about 1 month ago