Configuration
To get the best experience with the Case Manager, there are a few settings you should configure before using it in production.
Inboxes
Inboxes are groups where your cases will be collected. You can create as many inboxes as needed to fit your review workflows.
You can manage inbox settings from the Settings → Inboxes menu:
-
Create a new inbox: click the
Create new inboxbutton at the top of the inbox list to add a new inbox. You can also create one directly from the Case Manager using the same button located below the inbox list.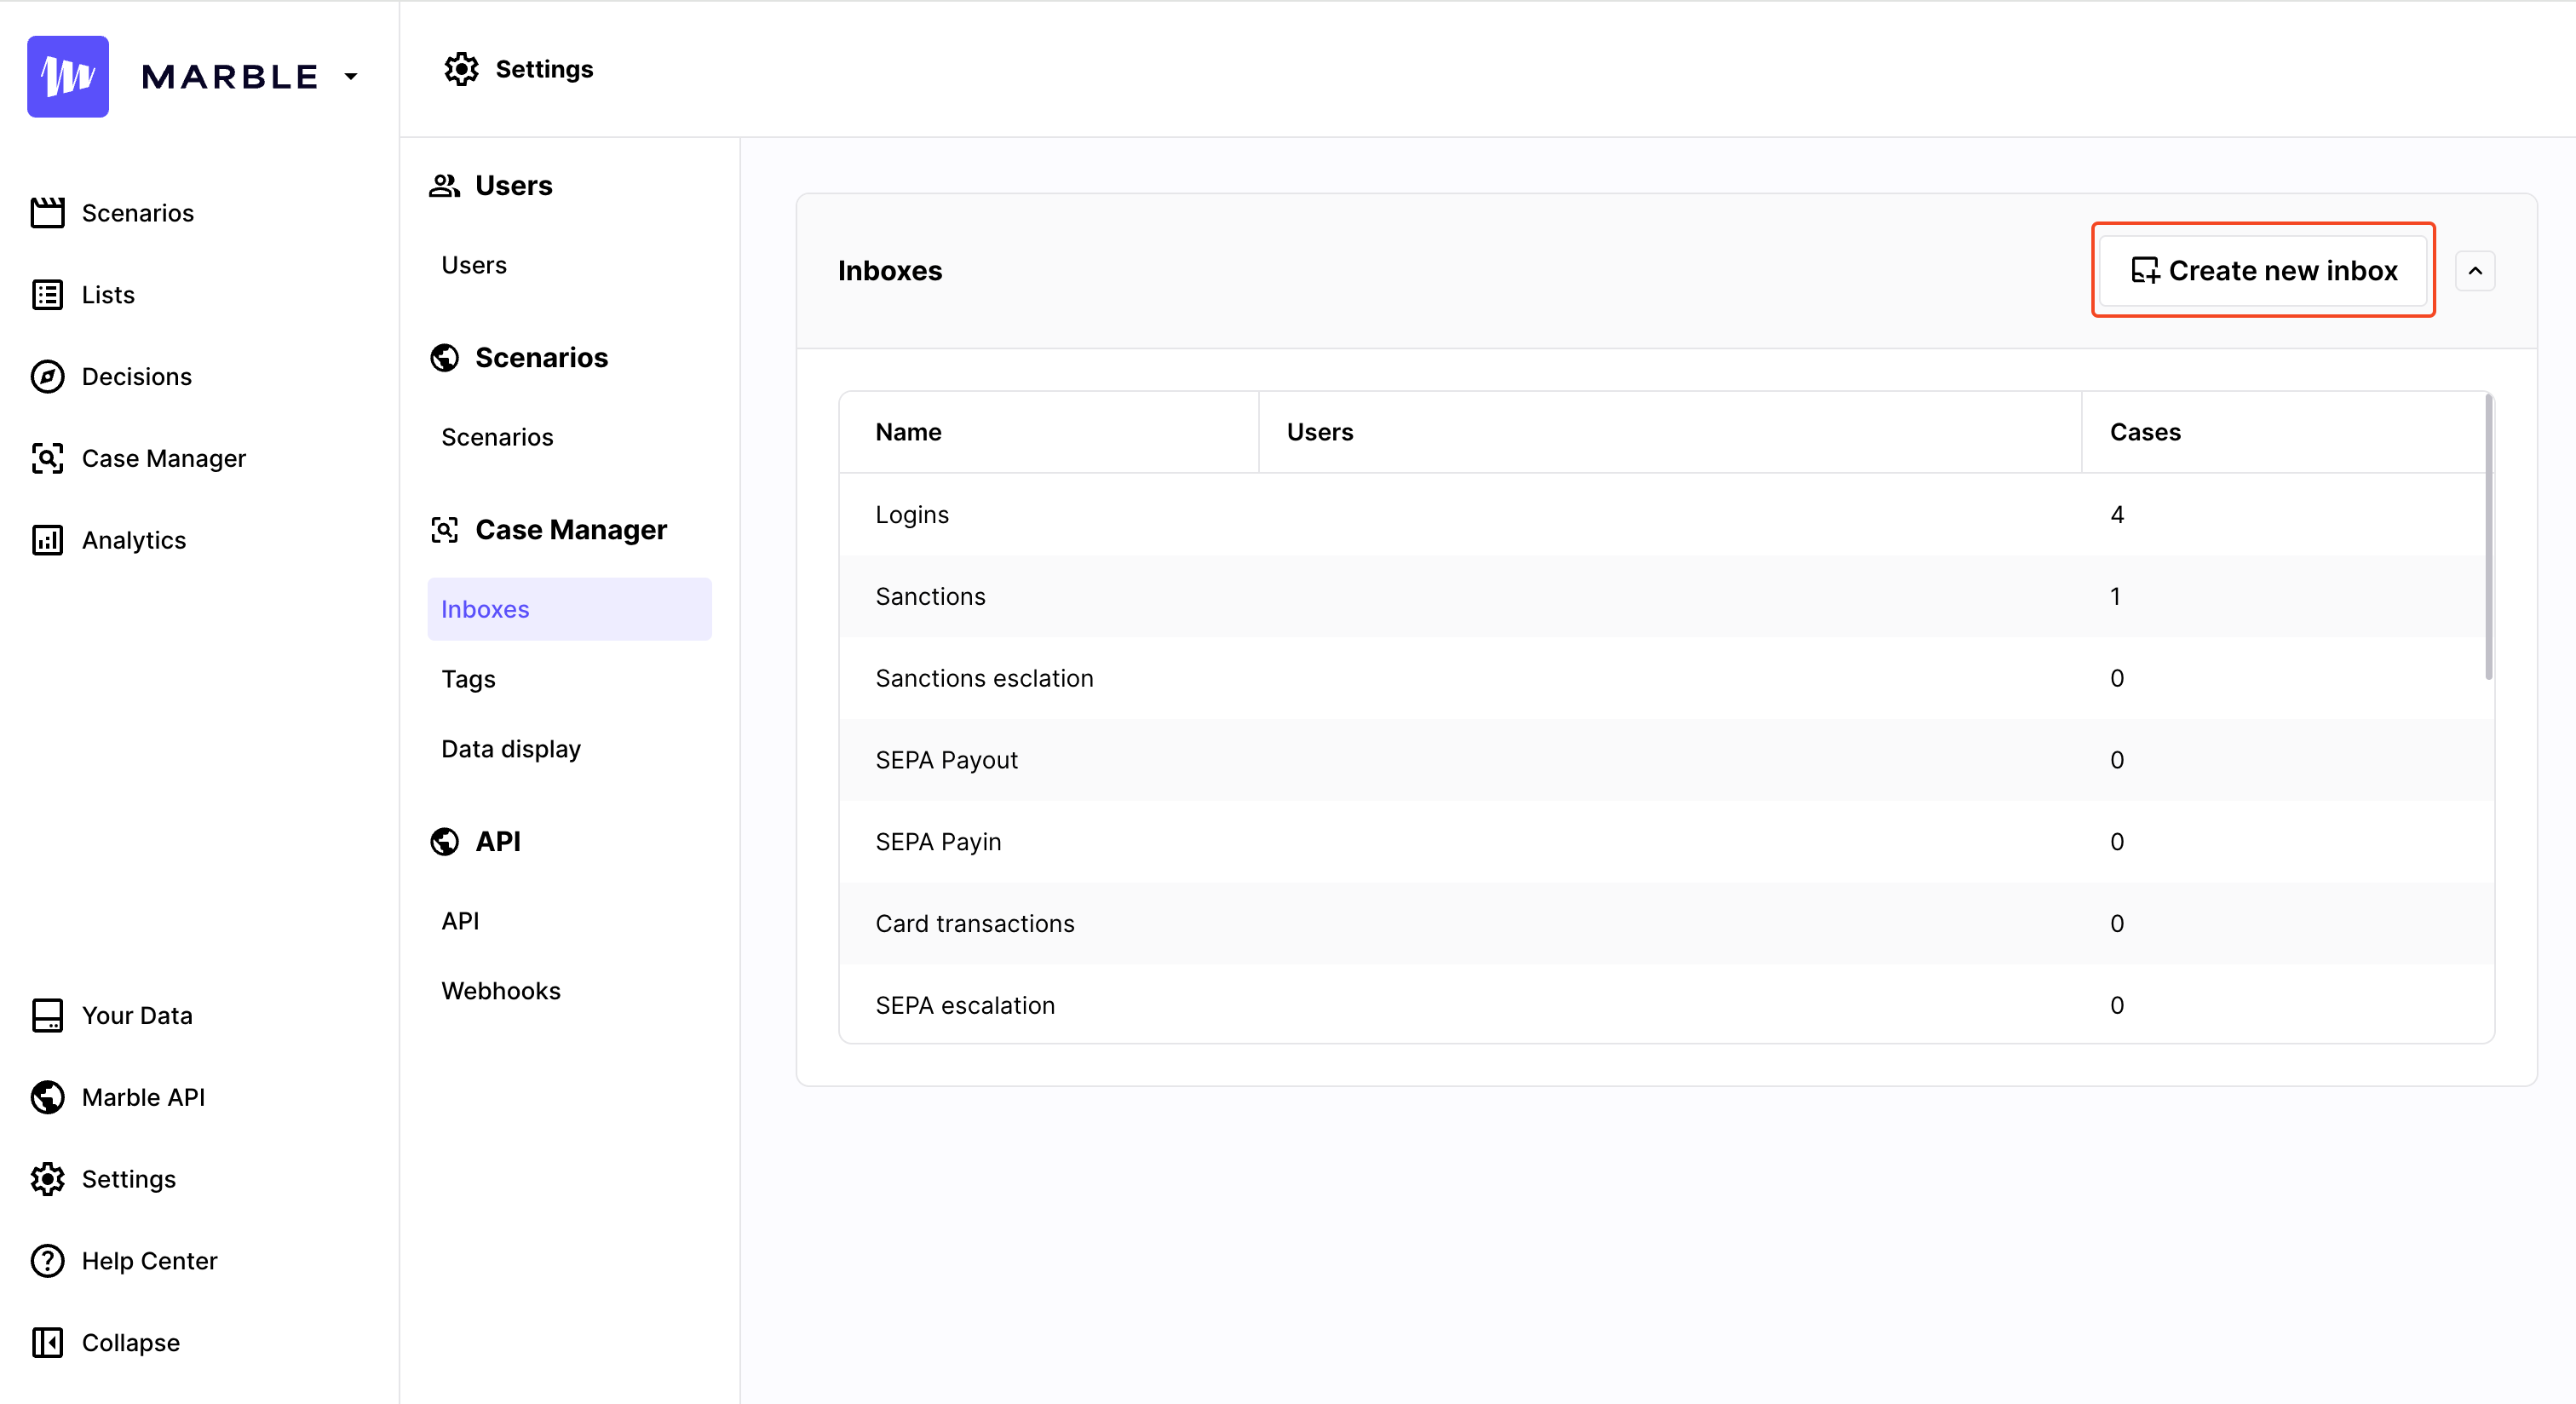
You can add as many inboxes as needed
-
Add an escalation inbox: select an inbox, then click
Update inboxto choose an Escalation Inbox. This defines where cases will be redirected if you choose to escalate them from the Case Manager.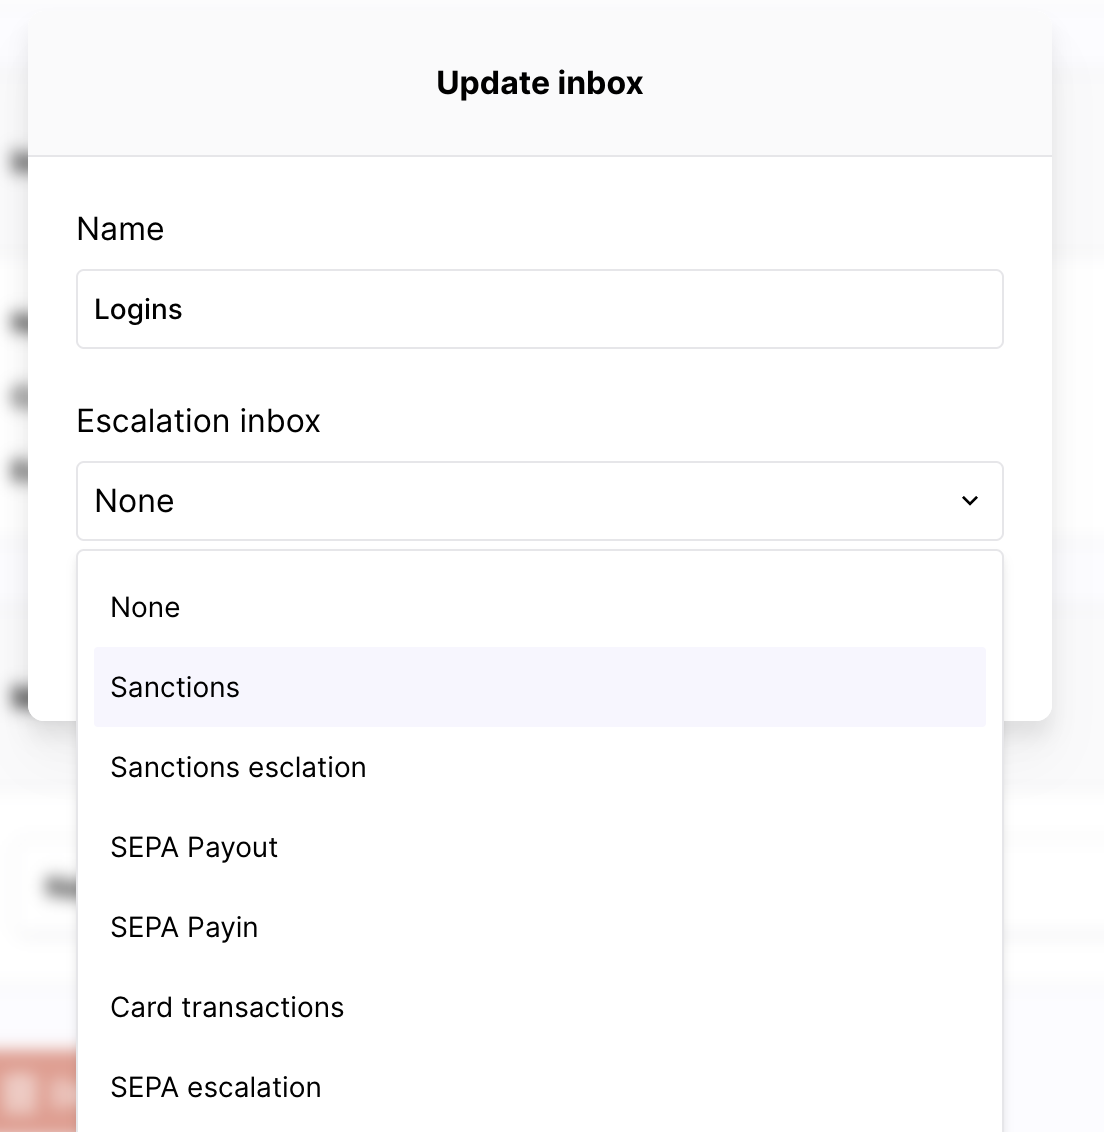
Escalation inbox needs to be set up from the Settings menu
-
Add users to the inbox: after selecting an inbox, use theMembers panel at the bottom to manage its users. You can add users (as long as they’re already part of your Marble instance), remove them, or change their roles. Only members and admin of an inbox can see its content.
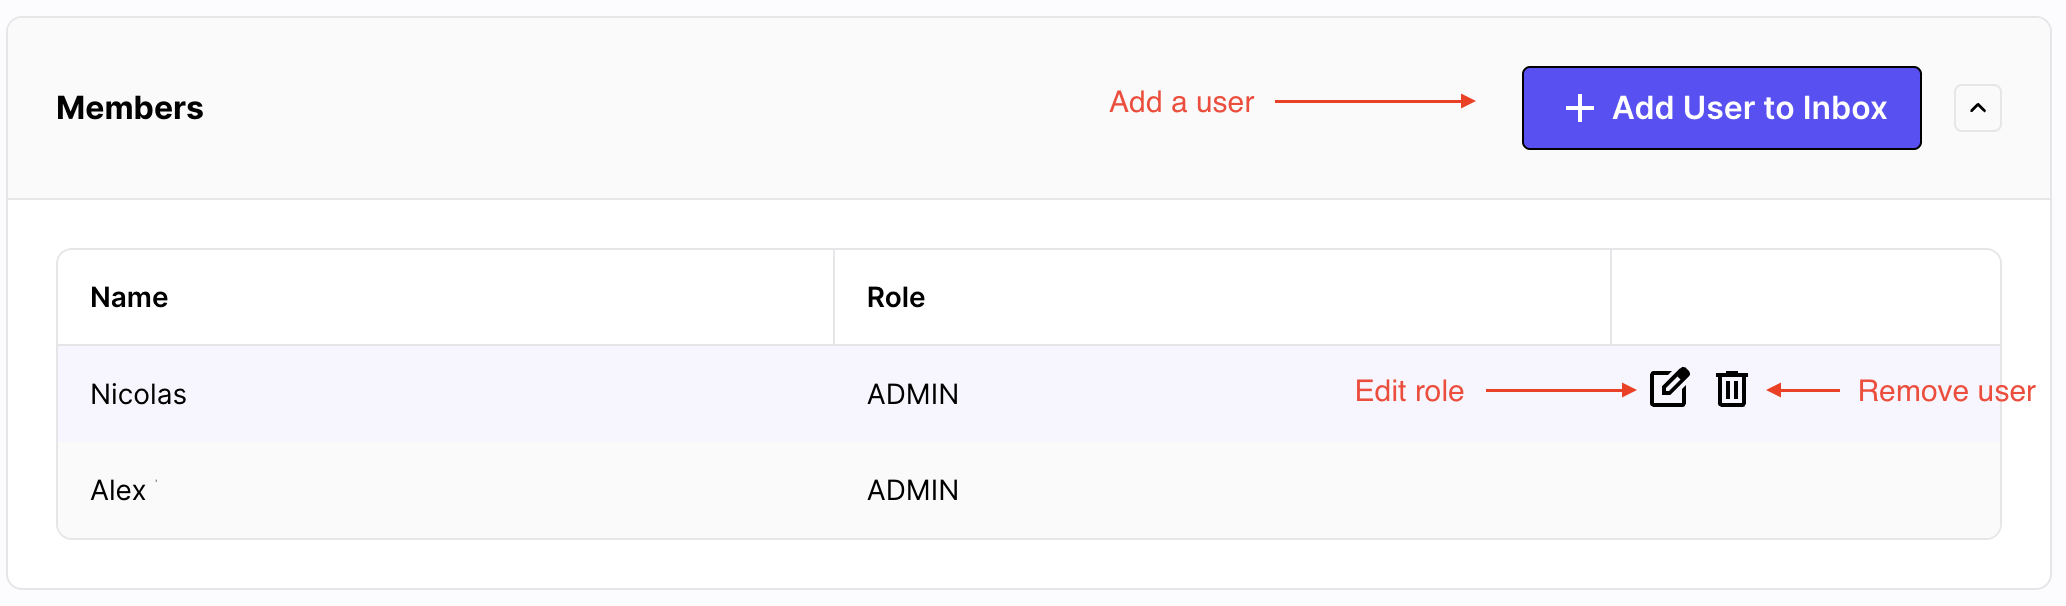
As an inbox admin, you can add, edit, or remove users from that inbox.
Common use case :
- Create a "level 1" inbox where a scenario sends any decision that is not "Approve"
- Give access to this inbox to the whole team that is working on perimeter of the scenario
- Create a "level 2" inbox and define it as the escalation for "level 1 inbox"
- Give access to the "level 2" inbox to senior members and escalation team only
That way, you've create the ability to escalate a case from the "Level 1" inbox were most team members are doing the first checks, to a "Level 2" inbox limited to senior investigators and managers.
Tags
Tags help you identify and organize your cases or objects. You can manage your tag list from Settings → Tags, where you can add new tags or modify existing ones—changing their names or colors.
There are two types of tags:
- Cases tags: these tags will be assigned to cases. They are available from the top section of your cases.
- Object tags: these tags will be assigned to objects from your database. They are available on the data exploration section in the right panel of a case.
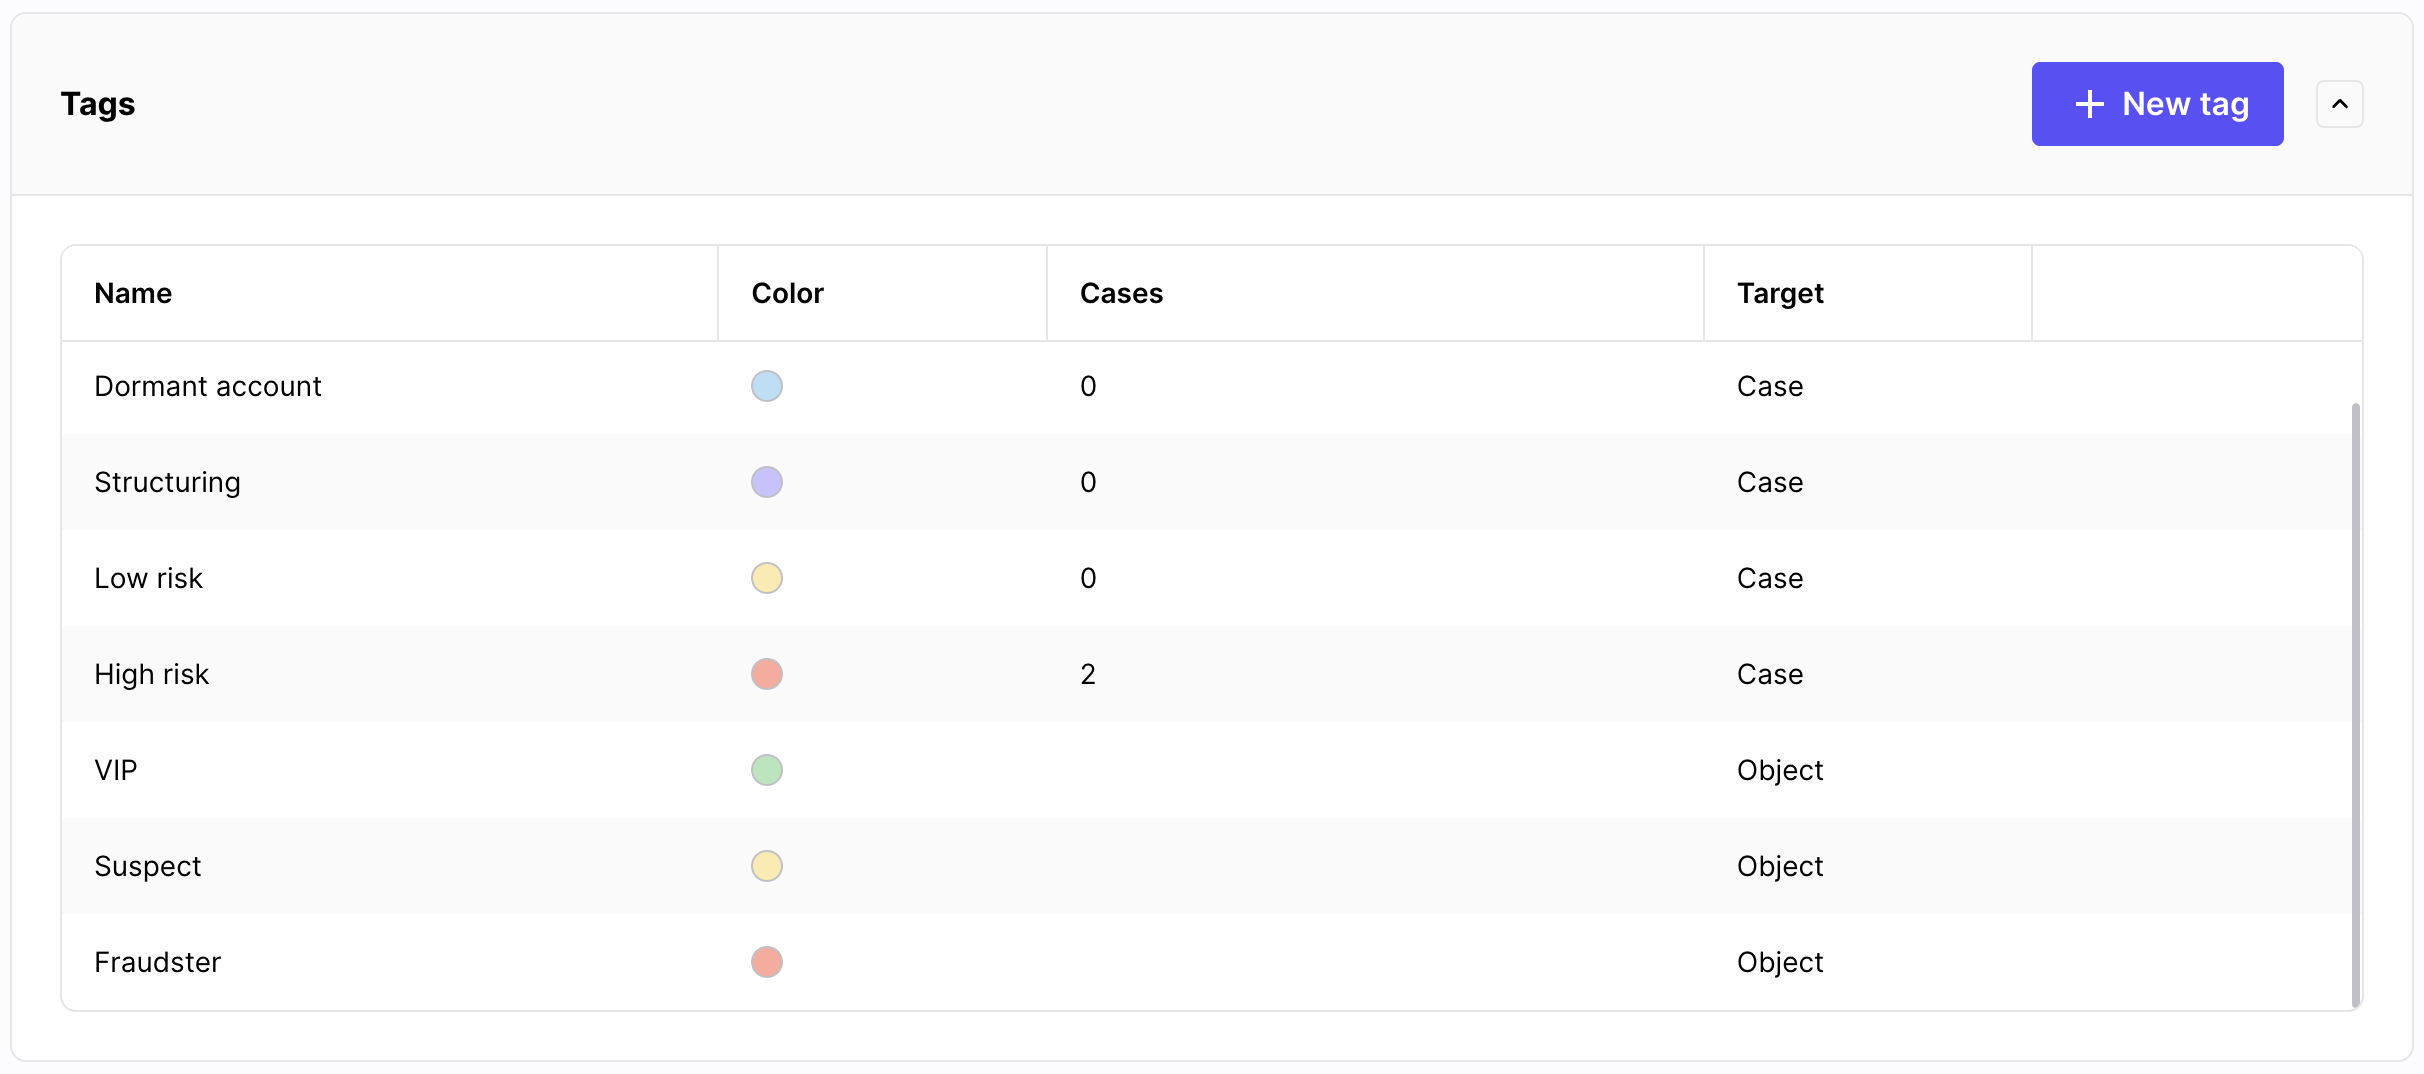
Add tags to identify your cases or objects of your data model
Data display
You can use this section to choose the way your objects are displayed in the case manager.
The Case manager allows you to explore data of objects related to your triggering object. You can customize this exploration to suit your needs by adjusting your preferences in Settings → Data display:
- Show or hide fields: use the toggles next to each field to choose which fields are visible during exploration.
- Reorder fields: use the drag handle on the left to set the display order of fields in the Case manager.
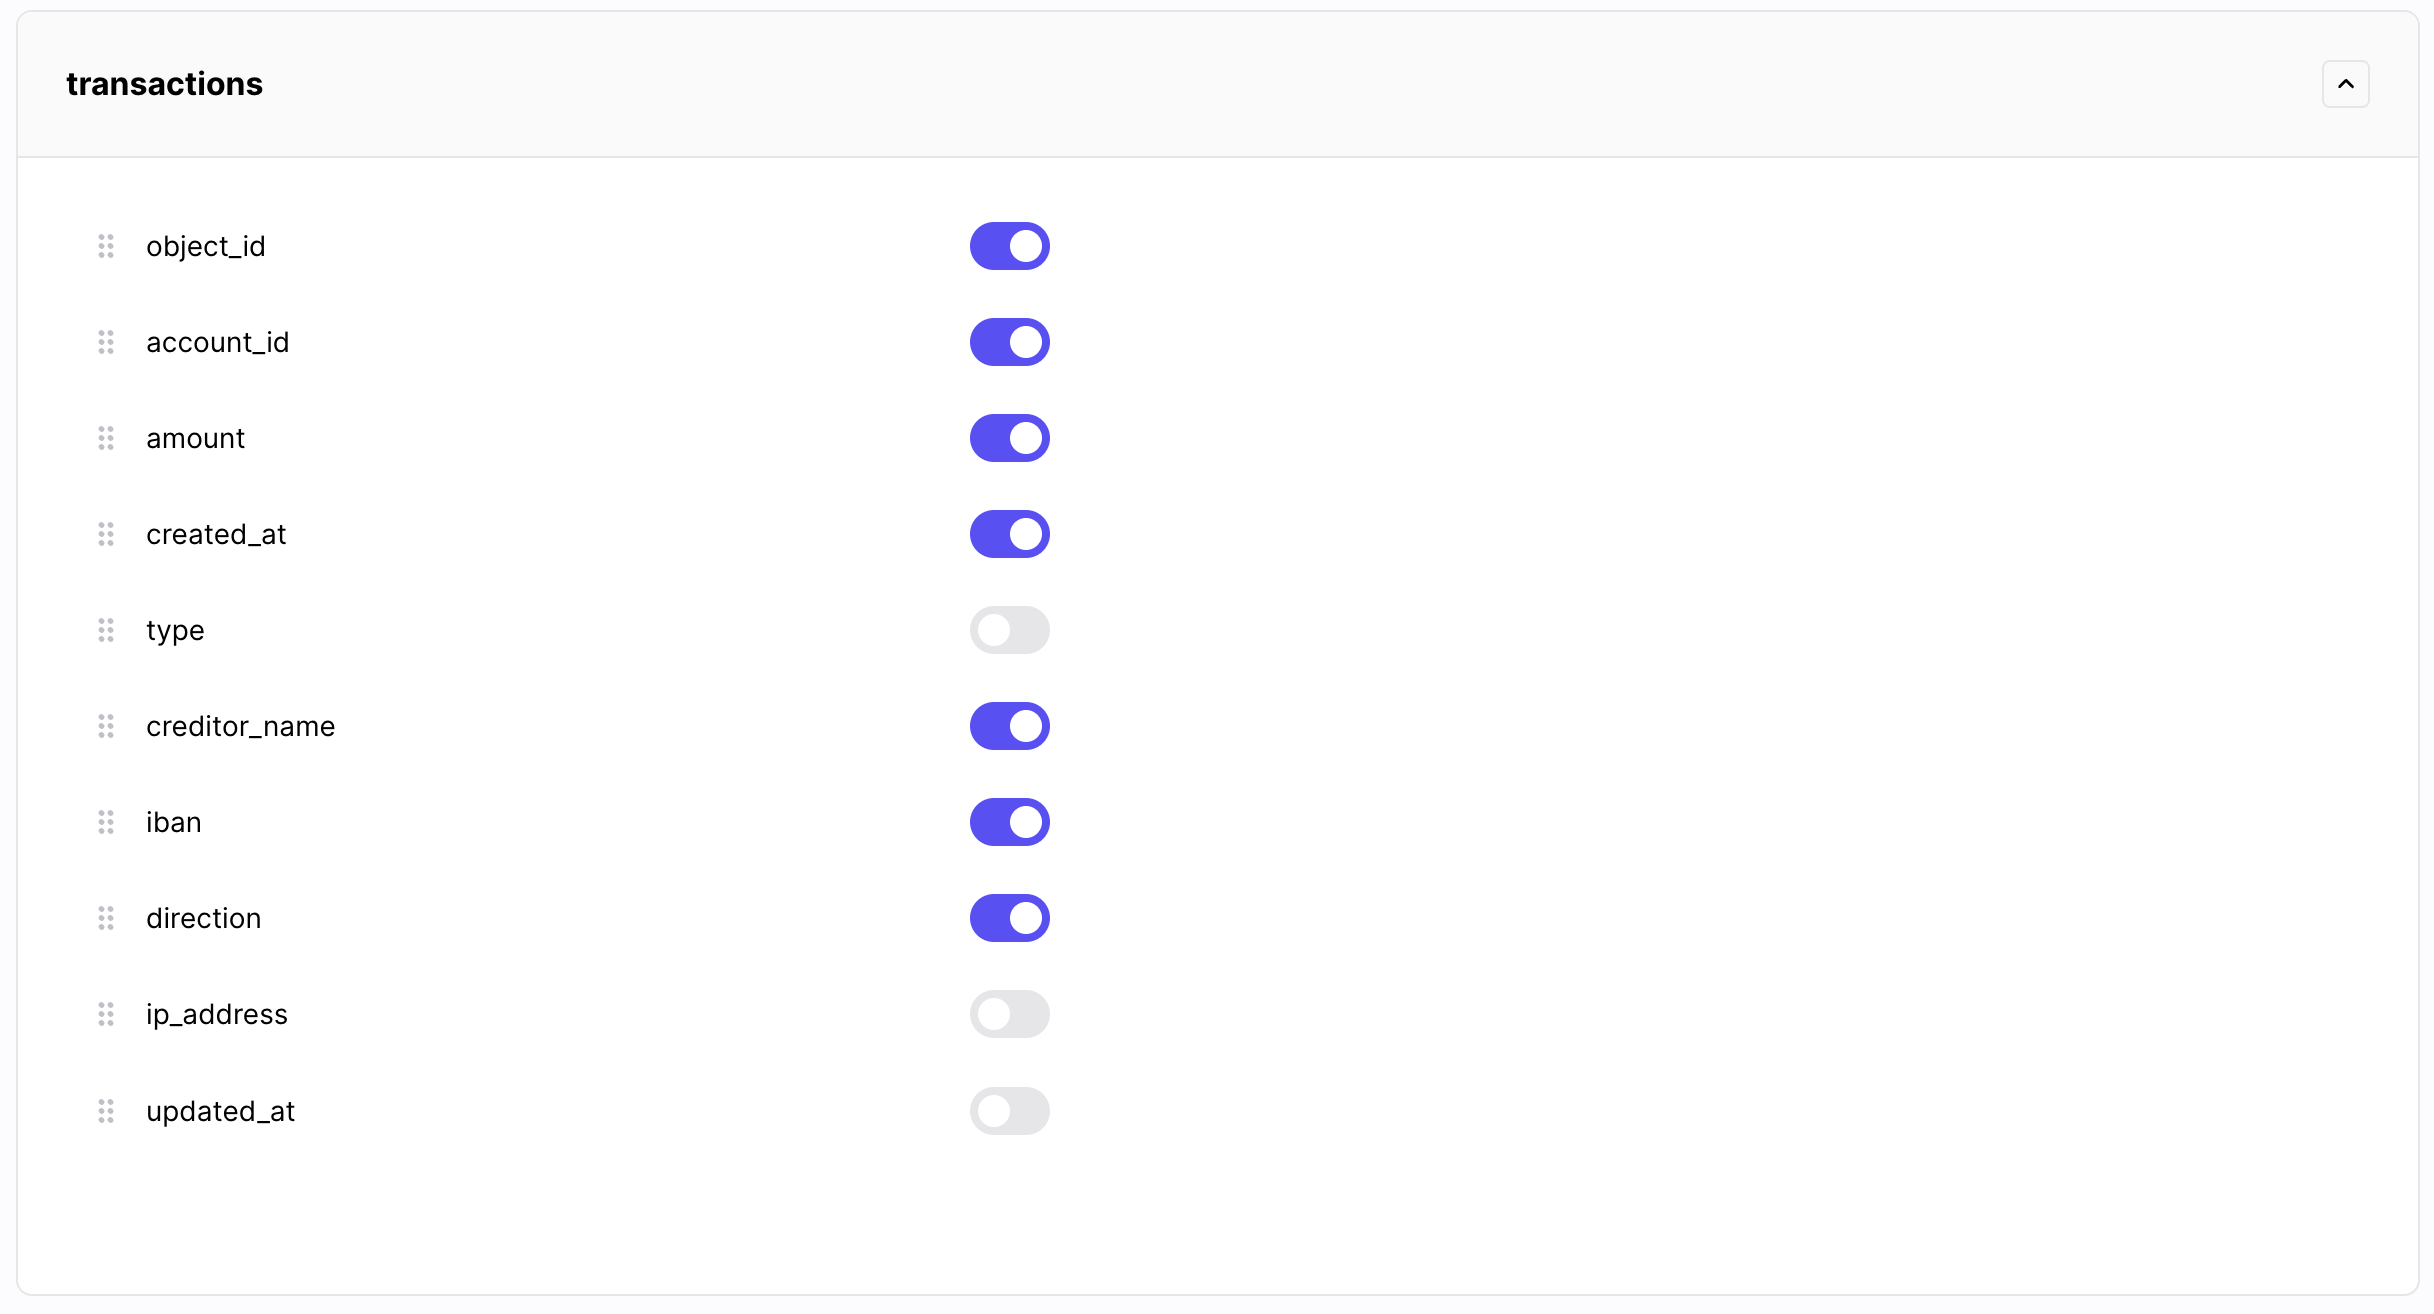
Chose the fields to hide and the order of display