1. Proof-of-concept
Define a data-model and upload data, activate your first scenario and make scheduled decisions.
During this phase, our focus is primarily on Marble setup and making initial decisions rather than the complexities of a full integration.
- Data importation will be manual, achieved by uploading .csv files via the Marble UI.
- Decision-making will be triggered either by schedules or manually initiated from our dashboard, without real-time API calls.
- Decision retrieval can be done by downloading them from the Marble UI or within our case manager.
This approach is particularly suitable for less time-sensitive tasks such as:
- Weekly and monthly user and transaction reviews, or post-processing activities.
- Comparing the results of new scenarios with an existing system you may already have in place.
Defining your data model
To begin working with Marble, the first step is to define your data model. You will find a detailed introduction on the creation of the data model here.
Marble provides an Example data model, which you can customize according to your requirements. While your data model can evolve over time, be mindful that making breaking changes (such as removing or renaming objects and fields) will require more effort.
Your defined data model will have two significant impacts:
- It will determine the schema of the objects your developers need to send to Marble later (so it needs to closely "match" your product's internal data model)
- It will influence how compliance officers write rules (so it needs to resonate with typically less-technical, more-business-oriented teams)
Marble can assist you in organizing workshops to ensure that this crucial step works for you in the long term.
Throughout the rest of this walkthrough, we'll assume that you're using the Example data model, which includes the following objects:
- Users
- Accounts
- Transactions
Uploading your first dataset
Now that you have setup your data model, it's time to populate your Marble instance with actual data.
For example, let's upload some accounts because we're focusing on account reviews in this initial iteration.
Navigate to the "Your Data" page, locate the "Accounts" section, and click "Add data". Here, you'll find an empty .csv file ready for download, containing all the required columns according to your established data model.
For a detail explanation, look at Ingesting data
At this stage, you'll likely need to extract some data from your product or analytics database.
As you fill in the .csv file, keep in mind:
- Not all fields (columns) may be required depending on your data model.
- Dates should be entered in the RFC3339 format, e.g., 2023-12-04T14:04:49Z.
- Strings should ideally be enclosed in quotes.
- Field names are case sensitive
Just be careful with Excel, it tends to break a lot of formats!
Writing your first set of rules
Once you have an agreed-upon data model and some data uploaded, you're ready to start your compliance work!
Writing the first set of rules is simple: create a scenario in the Marble UI and add rules to it. During this POC phase, we'll use Marble without any technical integration, relying on manual data uploads.
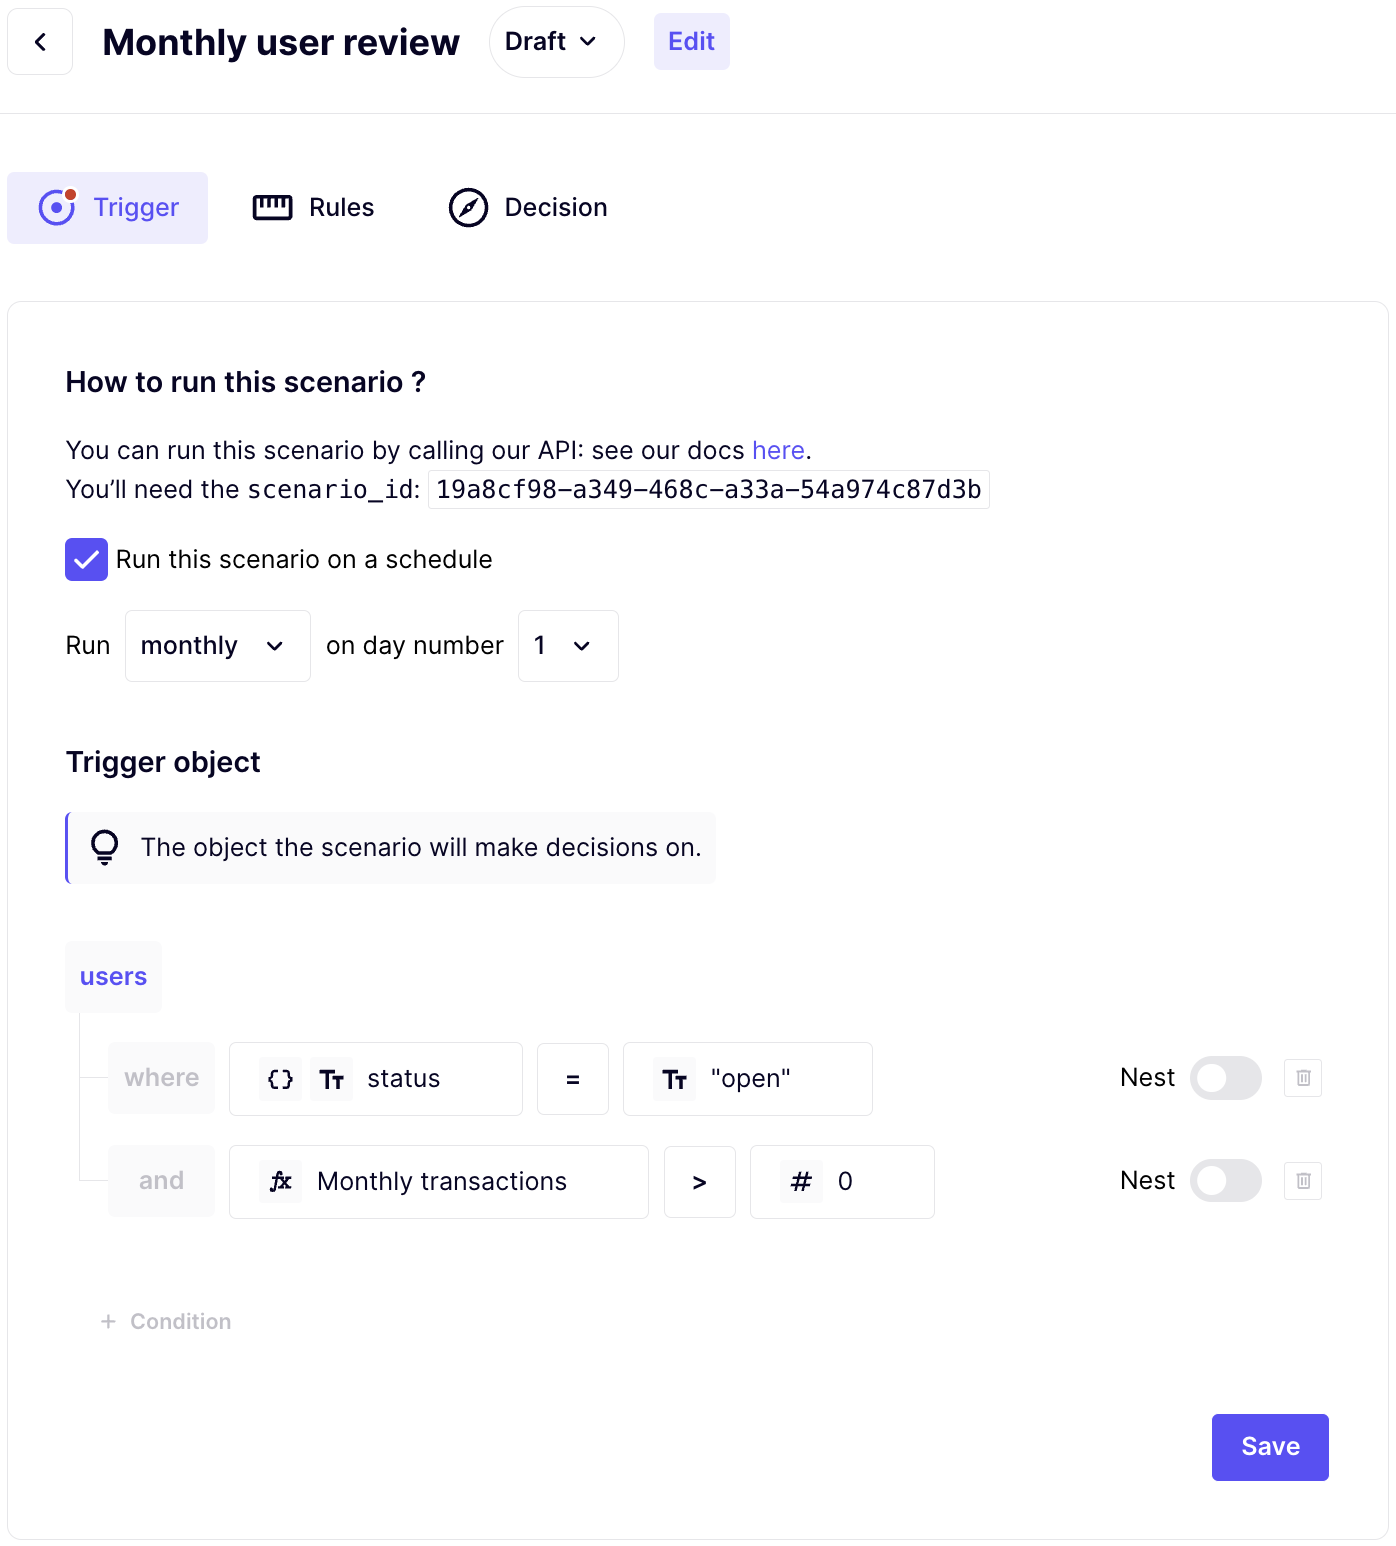
Let's begin by working on a new scenario that is not time-sensitive: Monthly user reviews.
We'll want to check for several things:
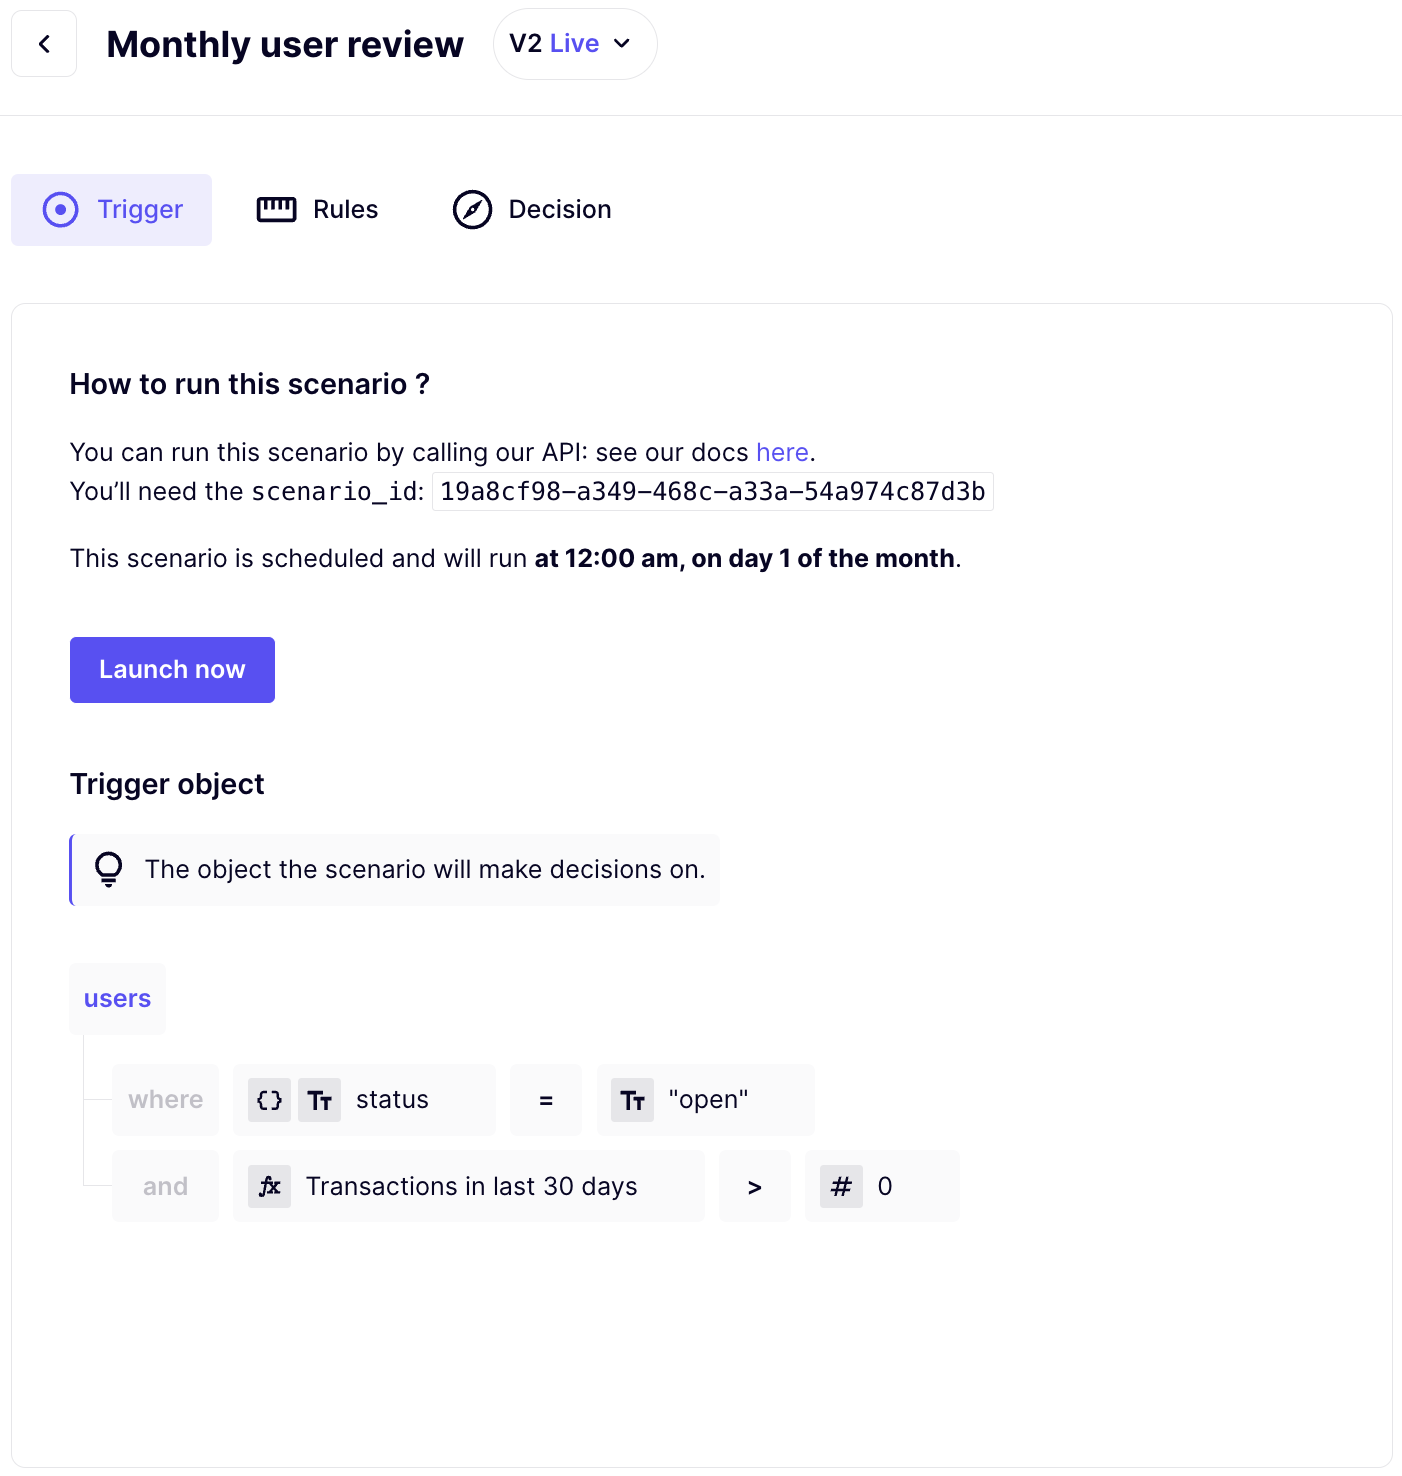
In the scenario's trigger page, we'll limit our analysis to users with an "open" status who have made at least one transaction in the last 30 days.
We'll implement a few simple Rules:
- Check if any transaction exceeds €150,000.
- Check if the total amount of this month's transactions is 150% of the previous month's total amount.
- Check if any transaction was sent to a blacklisted country.
- Check if the user has been a customer for more than 2 years.
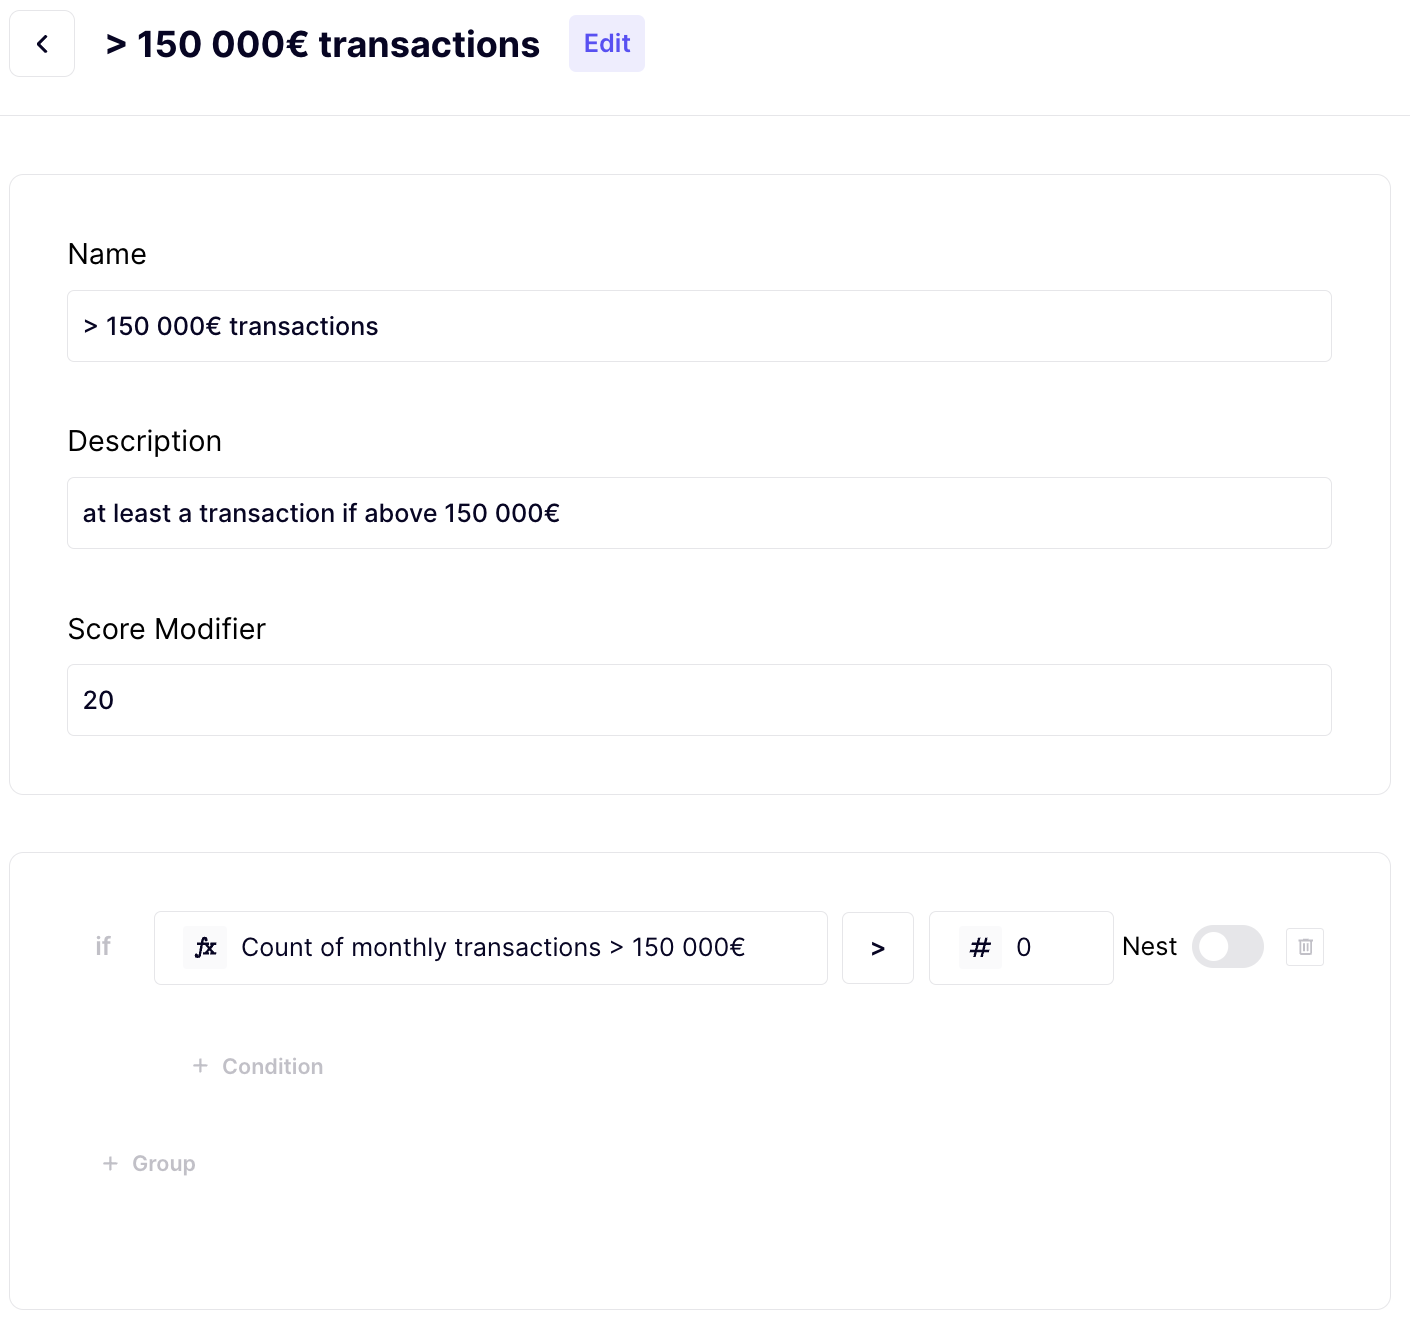
For the first one, we'll define a Variable that counts the number of transactions in a month :
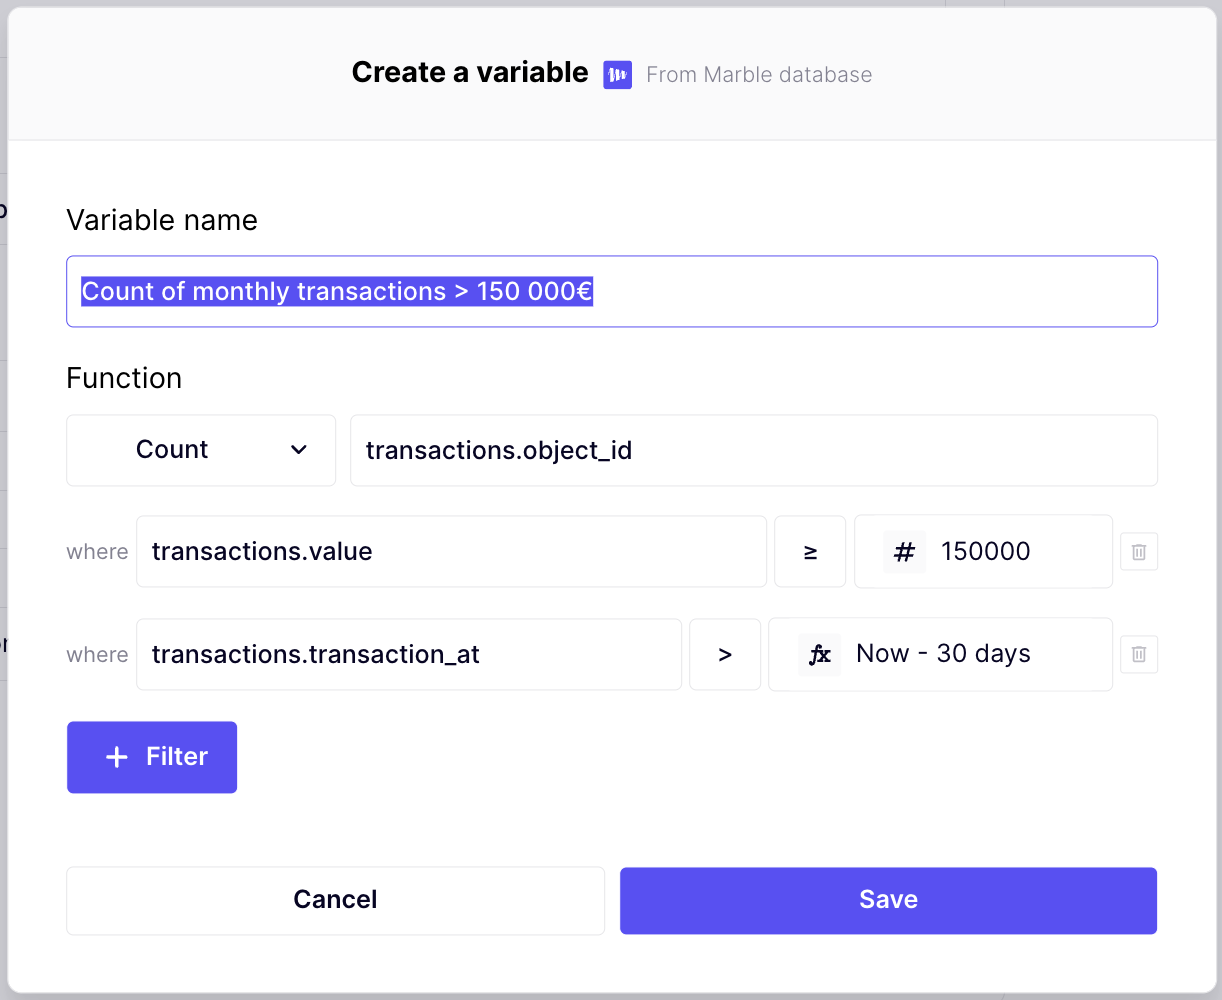
Then we'll use that count in a simple rule :
Following the same process, let's create all rules:
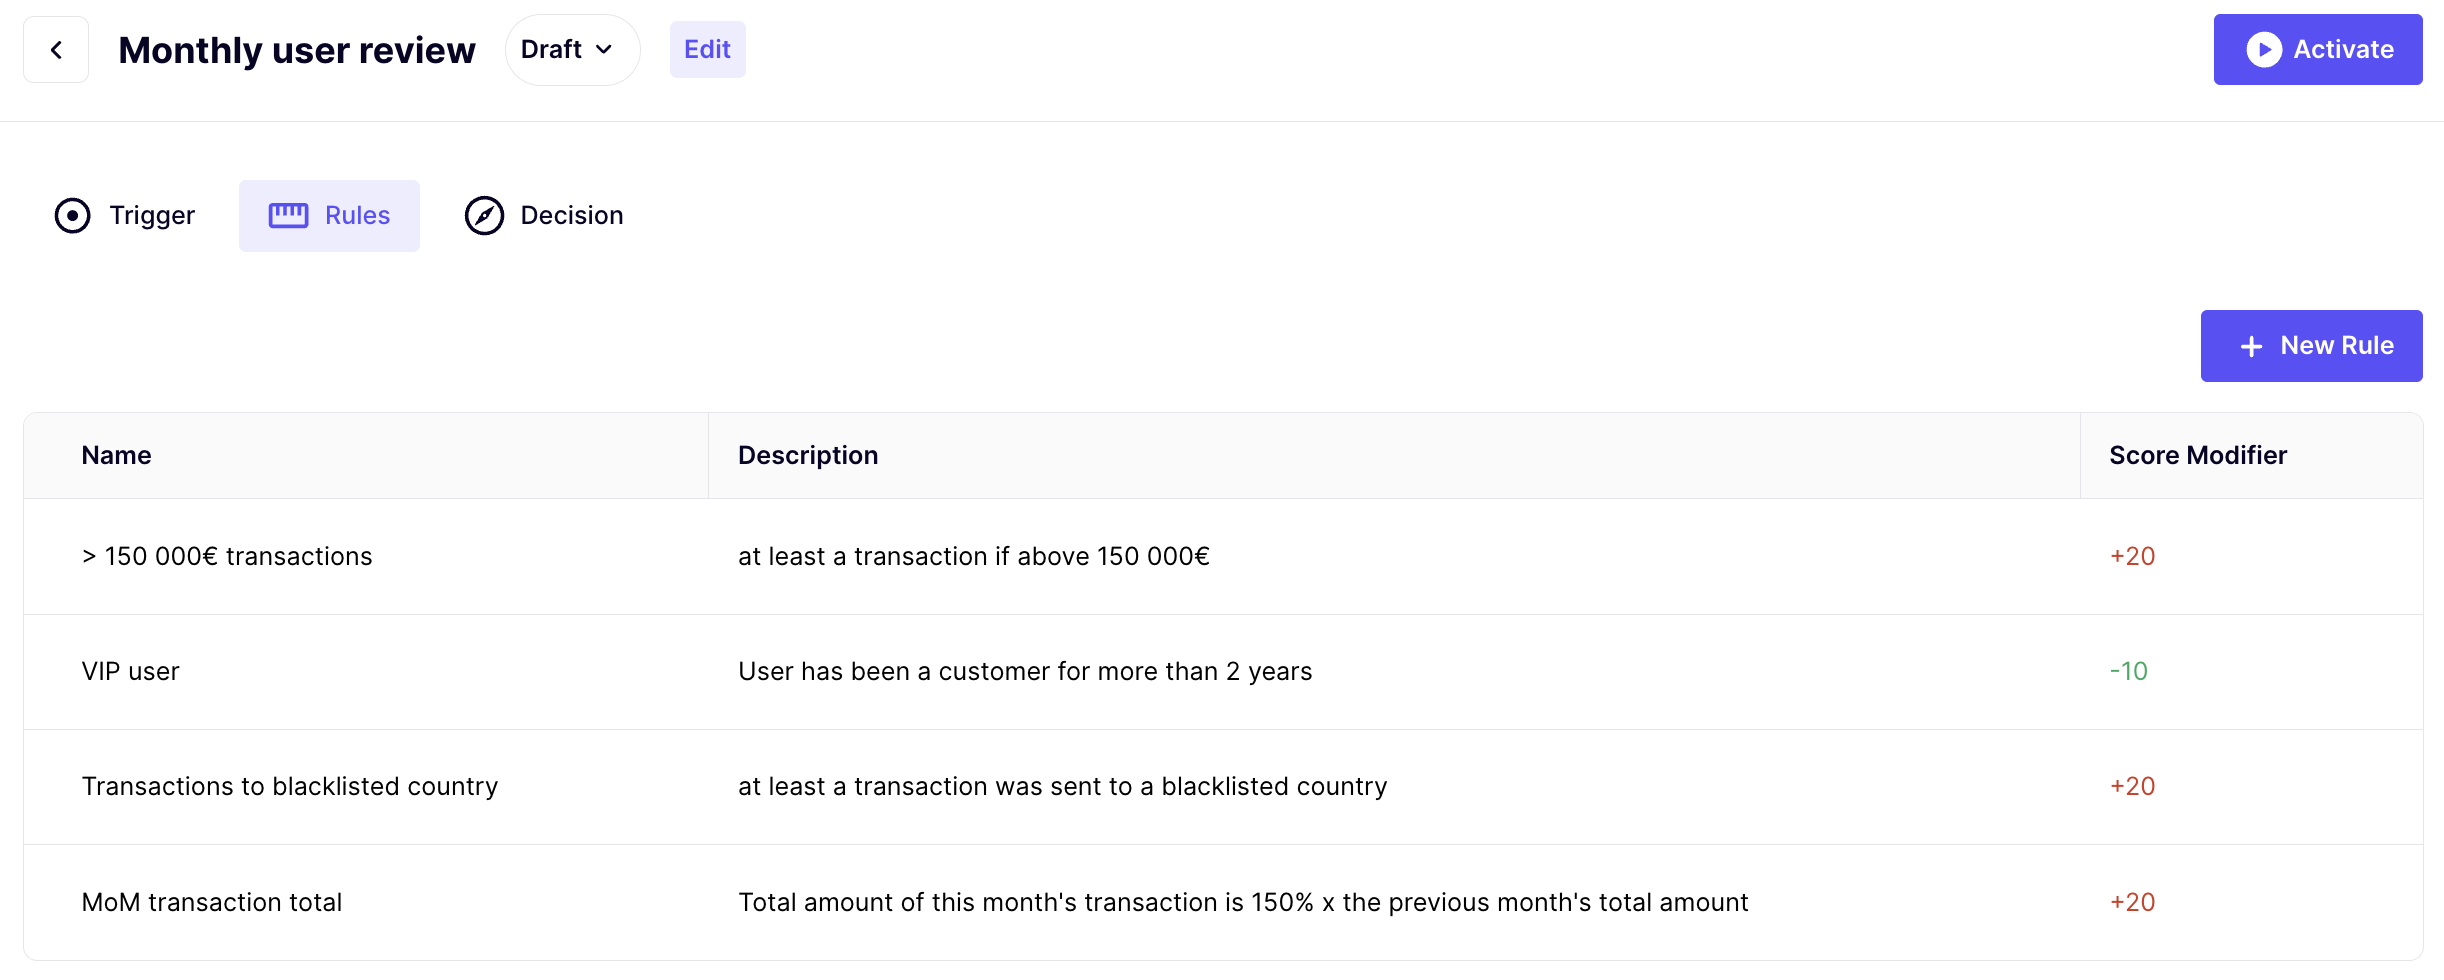
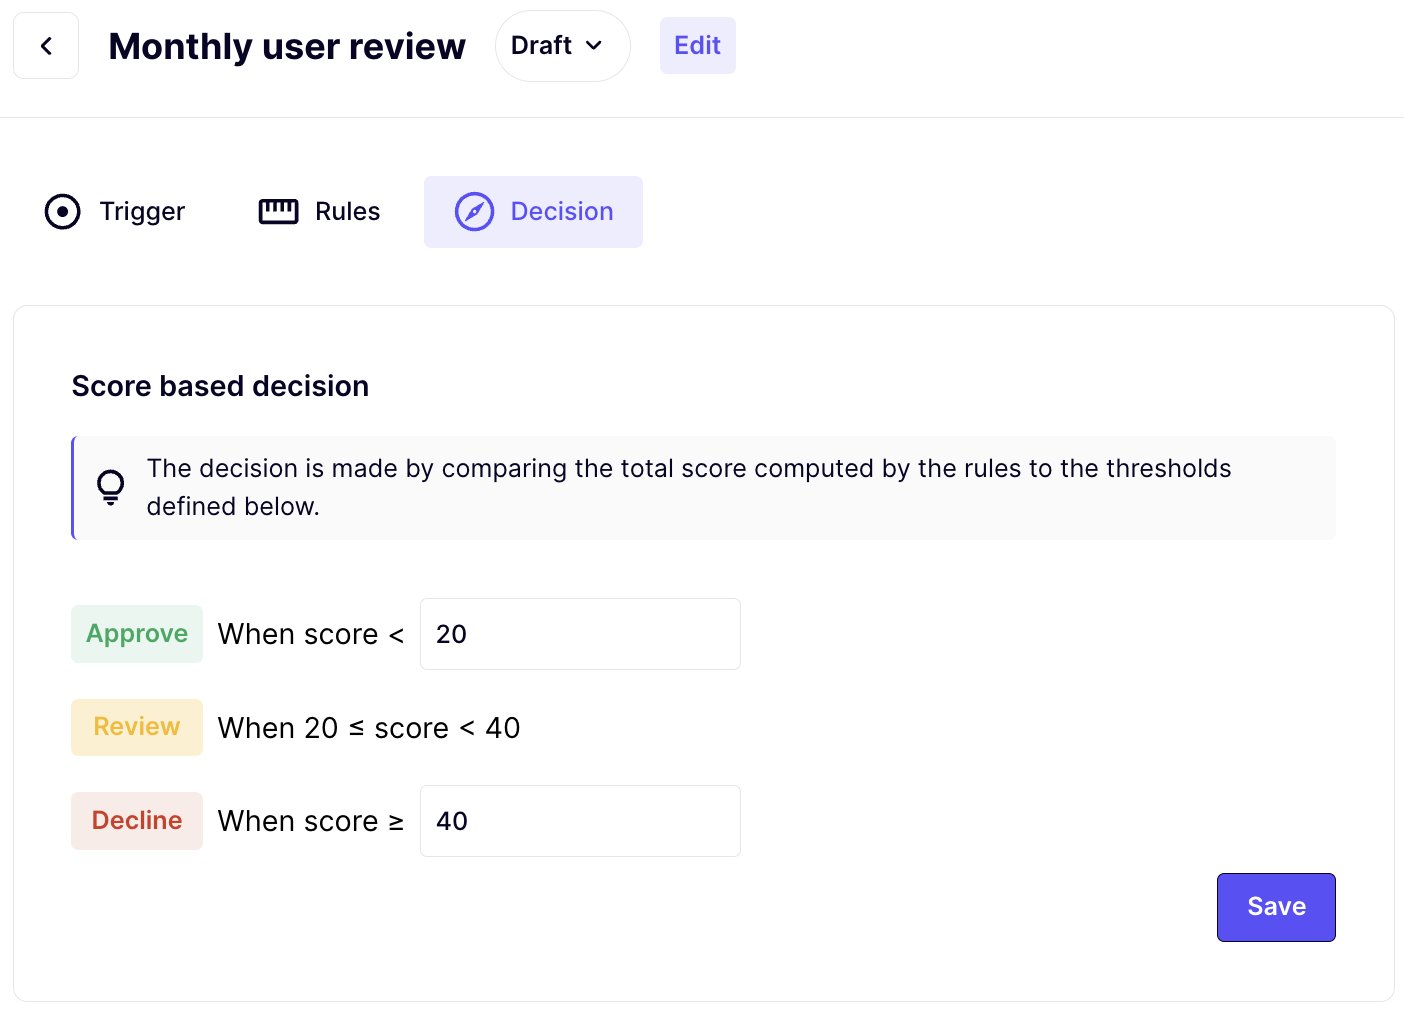
You'll note that the last rule ("user has been a customer for more than 2 years") has a negative score, meaning it reduces the risk score associated with the decision.
To finish off this scenario, let's configure our thresholds. We want the decision for a specific user to be "Declined" if at least one rule is true, so we'll use the following settings:
The final step in making decisions on your users is to set up a schedule. Since we want to review these users monthly, we'll schedule it to run on the first day of every month.
Don't forget to Activate your scenario, as it is now only in a Draft state.
Eager to receive your first batch of decisions? Simply click "Launch now", and Marble will initiate a batch within the next few minutes (with a minimum 1-minute delay before it starts running).
Processing decisions
Your first batch of decisions should be ready any minute now. Go to the "Scheduled executions" page to download your decisions.
Decisions can be downloaded in a newline-delimited JSON format, with each line representing a single decision. You can then manually process each decision as needed, likely using a tool like Excel.
Additionally, you can view and investigate the decisions in our Case Manager.
Recap
For this proof of concept, we've successfully chosen a data model, uploaded the corresponding data, crafted a useful first scenario, and checked accounts!
Updated 29 days ago